Published on Nov. 15, 2022
Optimizing hatching egg management
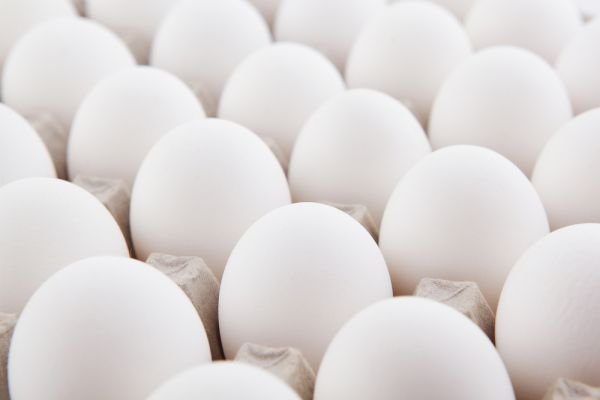
Good quality chicks start with good quality hatching eggs. Next to breeder flock management, also the management of the hatching egg itself plays a role in the development of a good quality chick! In this technical bulletin further insight will be provided in optimizing the management of hatching eggs.
Let’s start with asking ourselves the question, what is a hatching egg?
In general, a hatching egg is defined as:
- A fertile egg
- A clean egg, free from bacterial infection
- Good eggshell quality
- An egg free from cracks and deviations
- Sufficient in egg size (hatching eggs targets differ per layer breed and regions)
There are various factors that influence the quality of the hatching eggs, parent stock management is among them. It should be no surprise that the health status and overall condition of the breeders has a major impact on fertility and overall egg quality. Both the roosters and the female breeders should be in good condition. Nutrition plays an important role in this, don’t underestimate the positive impact of a good quality parent stock diet on the hatching egg and chick quality.
As soon as a hatching egg is laid, it is important to handle and store it with care.
"Don’t forget, an embryo is as much alive as a living chick, it’s just not visible!"
Egg storage is the time between oviposition (the egg is produced) and the start of the incubation process for hatching eggs (the egg is placed in the setter). Overall, it is known that optimal hatching results and chick quality can be achieved when eggs are set after an initial adaptation period of 1 to 2 day(s). This period allows carbon dioxide to diffuse from the egg, which thins the albumen and increases the albumen pH from 7.6 at oviposition to pH 8.8 - 9.3. on the contrary, the yolk pH remains virtually constant around pH 6.5. This causes the embryo, which is situated on the yolk, to be exposed to a pH-gradient. This pH-gradient optimizes early embryonic development.
When hatching eggs are stored beyond two days, a loss of hatchability and reduced chick quality can be observed. And next to this, it is known that day-old-chicks from longer stored eggs show a higher incidence of ‘black navels’ (observed in brown and black layers).
In the table below recommendations for hatching egg storage can be found.
| Storage duration |
Temperature (°C / °F) |
Relative humidity (%) | Egg orientation |
|---|---|---|---|
| 0-3 days | 18-21 / 64–70 | 75 – 85 | Blunt end up |
| 4-7 days | 15-17 / 59–63 | 75 – 85 | Blunt end up |
| 8-10 days | 12-14 / 54-57 | 80 – 85 | Blunt end up |
| More than 10 days | 12-14 / 54-57 | 80 – 85 |
Preferably small end up or turning the eggs an uneven time per day |
As can be seen from the table, recommended storage temperature goes down as the storage duration is increased. Lower storage temperatures for hatching eggs help by slowing down the deterioration rate of embryonic cells as it slows down the physical deterioration of the albumen and yolk membranes.
In general, the storage of hatching eggs influences several physiological aspects of the hatching egg. The most important ones have been listed below:
- Weight loss, a hatching egg can lose 0,2 to 1,0 gram per day during storage
- Water diffuses from albumen to yolk, resulting in mottling of the yolk.
- The yolk membrane becomes thinner
- CO₂ diffuses out of the egg, the albumen becomes thinner which increases the pH
- The increase in pH is important and necessary because early embryo development is governed by enzymes that are dependent on this change in pH
- the chicken embryo remains in stable stage of development if stored below “physiological zero”
‘Physiological zero’
Although the exact level of the so-called ‘physiological zero’ is debated by hatchery specialists and researchers, there is a consensus that embryonic ¬development, which starts in the hen’s body, will continue if internal egg temperature is higher than 25 - 27 °C / 77 – 81 °F. To maintain best hatching potential, eggs should be cooled down uniformly and gradually from the time being laid, to between 18 and 25 °C in approximately 6 hours. Too fast cooling results in under-developed embryos. Too slow cooling results in too many advanced embryos. In both cases embryo survival of stored eggs is reduced.
Cooling down
The rate at which hatching eggs cool down depends heavily on the nest type as well as the frequency of egg collection. Eggs produced in manually collected litter nests cool down very slowly to environmental temperature, due to the insulation provided by the surrounding nest litter. Since nest boxes are shared between 5 - 7 hens, warmth is brought to partially cooled-down eggs again every time another hen enters the nest. It is only once eggs are collected that they can cool down properly. In automatic nests, the eggs roll away to an egg transport belt soon after being laid, which exposes all the eggs to a similar environmental temperature. Cooling down will occur uniformly, but when there are draughts of cold air over the egg belt there is a risk that eggs cool down too rapidly.
The type of egg tray used for egg collection and further storage also have its impact on hatching egg quality. Egg temperature at the time of collection will vary from hatching egg to hatching egg, with some still holding a temperature of more than 25 °C / 77 °F. In this case, further cooling is required. Below the pros and cons of different types of trays are explained.
- Paper tray: A newly produced egg, with a temperature close to that of the hen’s body (41 °C / 106 °F), will take much longer to cool down when placed at the center of a paper tray and covered by the next full tray, then an egg placed at the side of the paper tray. Packing warm eggs on paper trays directly into egg boxes will certainly lead to high embryonic mortality!
- Setter tray: Due to the more open character and the fact that filled setter trays are not stacked directly on top of each other there is an adequate supply of free circulating air over the trayed eggs. This will greatly assist in uniform cooling, but if the temperature in the egg collection room is too low there is the risk that eggs cool down too rapidly, especially when exposed to a draught of cold air. It is important to monitor the temperature of the hatching egg collection room.
- Plastic trays: These are intermediate between paper trays and setter trays, because plastic is not such a good thermic insulator as paper and allows some restricted air flow over the eggs.
Sweating of eggs
Egg sweating is caused when a high relative humidity around the cold eggs will cause condensation on the egg surface. The sweating of eggs allows for bacterial contamination of the hatching egg and the chilling effect caused by the sweating on the embryo leads to early embryonic mortality.
Eggs will 'sweat' if the relative humidity (% RH) in the egg traying room is higher than the values shown in the table below.
| Temperature of the egg traying room: | ||||
|---|---|---|---|---|
|
Temperature of storage room 1) |
15 °C / 59.0 °F | 18 °C / 64.4 °F | 21 °C / 69.8 °F | 24 °C / 75.2 °F |
| 21 °C / 69.8 °F | - | - | - | ≥ 85% RH |
| 18 °C / 64.4 °F | - | - | ≥ 83 % RH | ≥ 71% RH |
| 16 °C / 60.8 °F | - | ≥ 89% RH | ≥ 74 % RH | ≥ 60% RH |
| 11 °C / 51.8 °F | ≥ 74% RH | ≥ 64% RH | ≥ 53 % RH | ≥ 44% RH |
Pre-storage incubation
Besides optimal hatching egg handling and hatching egg storage there is another method to improve the hatching egg quality of eggs that are stored for longer periods. Pre-storage incubation is one of them. The objective of pre-storage incubation is to develop the embryo to a stage of embryonic development that is better able to survive prolonged period of hatching egg storage.
Good planning is key in optimizing hatching egg storage and use, the responsible hatchery manager and personnel assigned to decide which batches should be exposed to pre-storage incubation and to control the pre-storage incubation process.
The procedure
Please be aware that there is no general recommended procedure for pre-storage incubation, because the performance benefit largely depends on the stage of embryonic development of the embryos in the eggs at the moment they arrive in the hatchery. The procedure below describes how to perform small-scale experiments to assess performance benefits and to establish an effective hatchery and egg type specific pre-storage procedure.
- Apply pre-storage incubation as soon as possible after egg receipt at the hatchery under the conditions that: a) eggs were not produced longer than 3 – 4 days before date of egg receipt at the hatchery and b) eggs are scheduled for at least 3 – 4 days extra storage at the hatchery.
- Carry out the experiments with eggs of at least 3 different breeder flocks per breed and select flocks of different ages.
- Select for each flock 4 setter trolleys with eggs of the same production date. 4. Place the three experimental trolleys in a running setter at incubation temperature; the fourth setter trolley is the control trolley and will not be incubated before further storage.
- Incubate the experimental eggs for 3, 6 and 9 hours. Every 3 hours 1 trolley should be removed from the setter.
- Place the 4 setter trolleys (3 pre-storage incubated and 1 control) for at least another 3 days in the egg storage room.
- Incubate both the pre-storage incubated eggs and the control eggs according to normal practice.
- Compare hatchability per trolley: pre-storage incubated eggs vs. control eggs.
- Evaluate results of all experiments and adopt the best pre-storage incubation procedure as indicated by the results. If no positive results can be achieved, and especially when early mortality is increased due to pre-storage incubation, it is an indication that embryos arrived at the hatchery in a developmental stage too advanced to benefit from pre-storage incubation.
Additional remarks
- It is not recommended to start incubation within 12 hours after the eggs arrive in the hatchery. Immediate setting after transport will increase early embryonic mortality. Eggs need a period of rest after transport.
- Storage times longer than one week are not recommended: after 6 days from production date, every day of storage, the hatchability decreases by approximately 0.7% - 1.0% per day.
- Stored eggs need about one extra hour of incubation time for every storage day more than six days.
- If hatchery planning is such that eggs need to be stored for more than 10 days, it is advisable to store them small end up, starting on the first day of storage. If this is not possible because eggs are stored on setter trays, turning the eggs an uneven time per day is recommended.
- Egg ‘sweating’ must be always prevented. When the environmental temperature of stored eggs suddenly increases, water may condense on the eggshell: we say the eggs are ‘sweating’. This should be always avoided since sweating of eggs provides an ideal environment for the growth of microorganisms that may penetrate the eggshell.
- Washing of hatching eggs is not included in the above procedure as the risk of internal contamination of dirty eggs is not eliminated by washing, and due to the potential for incorrect washing practices, the risk might even increase. Moreover, depending on the detergents used, the protective cuticle could be removed. Rather than focusing on cleaning dirty eggs, the emphasis should be on preventing eggs from getting dirty in the first place.
- The optimal climate settings in the egg storage room should be decided by or at least coordinated with the hatchery manager to avoid sweating during truck loading and to match with intended storage duration at the hatchery and climate conditions in the hatchery’s egg storage room. Continued storage at the hatchery should at least be at equal temperatures and not higher!
This technical has been based on the knowledge from the Hatchery Management guide, that has been produced in collaboration with Royal Pas Reform.
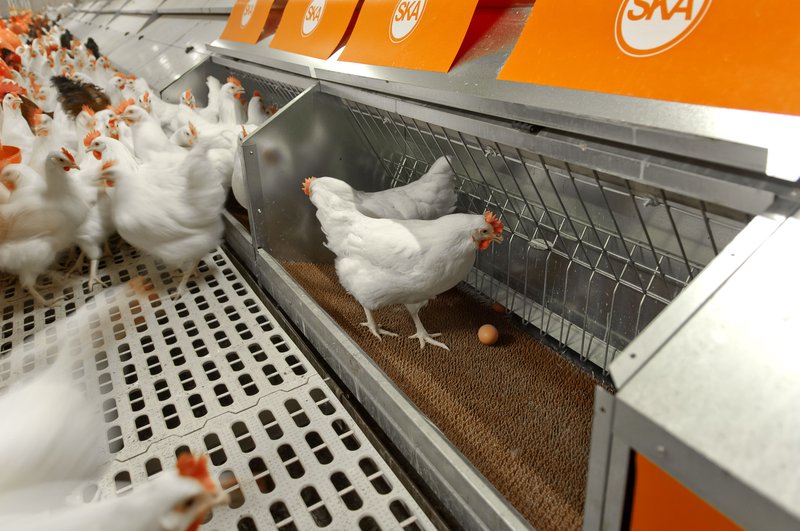
Clean nests are a good first step in proper hatching egg management